You can perform the migration either from the System Administration Tool or from the Mitel Integrated Configuration Wizard.
Caution: After you migrate your network to RDN Synchronization, you cannot use OPS Manager to maintain the element telephone directories, or to perform Moves, Adds, and Changes.
Caution: After you migrate to RDN Synchronization, do not downgrade back to a non-RDN Synchronized network. A downgrade will incur many shared data updates. Downgrading is not recommended or supported.
In an existing SDS sharing cluster or network, you must migrate all the member elements in a single operation:
Note: You cannot migrate each element sequentially.
Upgrade all elements within the network or cluster to MCD Release 4.0 or later software and configure them to share data via System Data Synchronization.
If OPS Manager is present in the network, synchronize the telephone directories of the network elements. In the OPS Manager application, click the Configuration menu, point to Directory Management, point to Synchronize With, and then click Network Elements.
Ensure that every directory number in the OPS Manager telephone directory has an associated name.
Perform a Full Propagation from OPS Manager to each element in the cluster.
Export the Remote Directory Number form data from each element.
Check the exported data for any directory numbers that have no associated name.
If the directories contain numbers without names, either delete them or add valid names to the numbers in the OPS Manager telephone directory.
Use OPS Manager to obtain a database backup from each element in the network. If the network does not have an OPS Manager, perform a backup from the System Administration tool at each element (see Backup Procedure for instructions).
Disable Property Management System (PMS) support. Access the Hotel Options Assignment form and set the "Property Management System Installed" option to "No".
Note: If Clustered Hospitality is configured, disable PMS at the gateway element. If standalone Hospitality systems are configured on elements in the cluster, disable it at each element that is connected to a PMS.
Using System Data Synchronization, synchronize the User Authorization Profile form across all the elements in the network. In the Network Element Assignment form, select all the network elements, click Sync, choose the Data Migration option, and then check the User Authorization Profile form. Click Ok.
At each element in the cluster:
Run the Migration Precheck maintenance command. This command provides a list of the existing local-only entries and any inconsistent entries currently on the element.
Print the output information from the maintenance command.
Collect the .csv file of the existing local-only directory numbers. A link to the .csv file is provided at the end of the command output. Copy the URL link provided at the bottom of the maintenance command output. Paste the link into the Address field of your Internet Explorer browser and press the Enter keyboard key.
Save the contents of each .csv file to your PC hard drive. Prefix the name of the .csv file with the element name.
Note: If all of the elements belong to the same Administrative group, you can use Application Reach Through to run the Migration Precheck command on each element from a single System Administration Tool login session.
Import the contents of each .csv file into the Local-only Directory Number List form on the master element (the master element is the element that you will use to initiate the migration). To import a .csv file:
Click the Import button. The Import dialog box opens.
Click Browse and navigate to the .csv file (for example: GDMPremigrateLocalDNCandidates.csv) on your PC hard drive.
Click Next and accept any security warnings that may appear.
Click Import.
After the import is complete, click Finish.
Review the printed maintenance command outputs from each element and determine if the inconsistent entries should be cluster dialable or local only.
At the master element, resolve any inconsistent entries.
"DN has no Teldir entry and is not resilient
or a remote number"
For entries that have no Teldir entry and do not appear in the Local-only
Directory Number List form, add the entry to either
the Telephone Directory Assignment form or to the Local-only Directory
Number List form. If you add the entry to the Telephone Directory Assignment
form, it will be cluster dialable after the migration. If you add the
entry to the Local-only Directory Number list form, it will be local only.
"DN is resilient or remotely hosted,
and appears in the Local-only Directory Number List"
For entries that have a TelDir entry and also appear in the Local-only
Directory Number List form, delete the entry from either
the Telephone Directory Assignment form or from the Local-only Directory
Number List form.
Synchronize the cluster telephone directories from OPS Manager. This step is required if you modified the Telephone Directory Assignment form.
De-program any scheduled synchronization operations from OPS Manager.
Shut down OPS Manager.
Prior to performing the migration, we recommend that you perform another upgrade at each element to the current software version (MCD Release 4.0 or later). Then, if you encounter issues during the migration, you can use the SWAP command to return each element to the pre-migrated state.
Log into the System Administration Tool of the master element (the element that you intend to perform the migration from). In order to perform the migration, you must log into the System Administration Tool with a User Authorization Profile that has Root Administrator privileges.
Logout all hot desk users and external hot desk users from the system.
Access the Shared Form Configuration form.
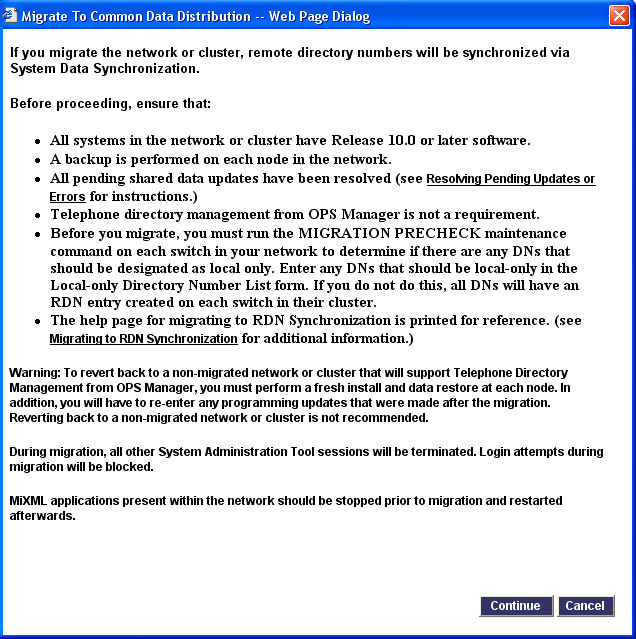
Click Migrate to Common Data Distribution. The system displays the following dialog:
Figure
1: Dialog for Migration of System in an Existing Network
Click Continue.
Any other System Administration Tool sessions that are in progress are
terminated. When the migration begins on each element, a maintenance log
is generated that indicates the start time of the migration process:
"Migration of data to GDM model: Start <timestamp>"
Note: The time required to complete the migration depends upon the number of elements and the number of directory entries (both telephone directory entries and user profile entries). It takes approximately 25 minutes per 5000 directory entries. For example, in a network with 10000 directory entries, the migration would take approximately 100 minutes to complete.
After the migration completes, the following message is displayed "Migration Completed. You must now log out and in again to continue". Click OK. The system logs you out of your System Administration Tool session.
Note: After the migration is complete, the Migrate to Common Data Distribution button no longer appears in the Shared Form Configuration form. Instead "Using Common Data Distribution" appears at the top of the form to indicate that RDN Synchronization is enabled in the network.
Log back into the System Administration tool of the master element and access the Maintenance Commands form. Enter the Migration Status and Migration Summary commands to verify that the migration is complete on all elements in the network.
After the migration, the sharing scopes for the modified forms are set to the system defaults. Access the Shared Form Configuration form and change the sharing scopes to the desired settings (see Specifying the Shared Data for instructions).
Synchronize the User data across the elements:
Access the Network Element Assignment form
Select the elements in the cluster.
Click Sync
Select Data Migration
Under "Shared Forms to be Synchronized" check the "User" and the "Service Hosting" boxes.
Click OK.
Download an updated version of the Import/Export spreadsheet. After the migration, you must use a different version of the spreadsheet.
Re-enable PMS support on the elements as required through the Hotel Options Assignment forms.